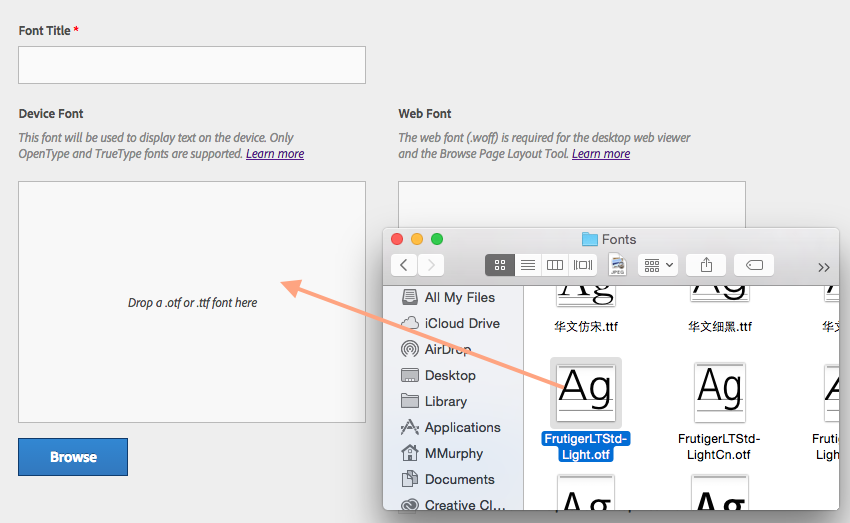
Using custom fonts in the cards you design for your Adobe Digital Publishing Solution app is as simple as dragging the font files into the Add Font pane, accessed from the Content & Layouts>Fonts section of the DPS Portal. Fonts added are then made available from a drop-down list when creating the metadata fields in cards designed in the Card tab, or when using the Content & Layouts>Layout Templates feature to design layouts and cards.
To Add Custom Fonts to a Project
- Sign in to the DPS Portal.
- Select a project from the projects drop-down menu at the top of the portal window.
- Select Content & Layouts in the navigation rail on the left.
- In the Content & Layouts section, select Fonts.
- Click the Create New Font icon.

- To add a font, either click and drag the font icon to the empty windows seen above or click the Browse button to search for and open the font files. Note: The font name is added automatically.
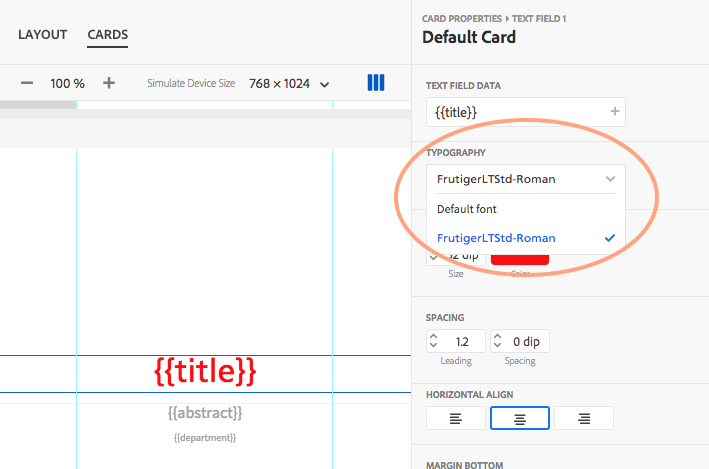
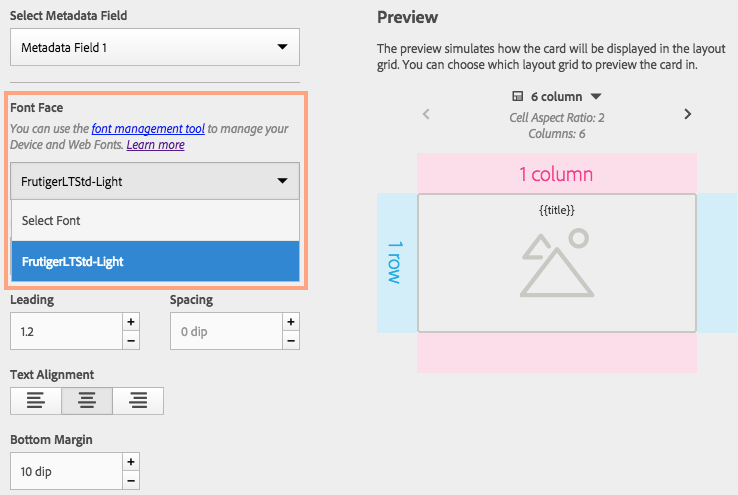
Any fonts added are now available from the drop-down menu when creating or editing cards in either the Card Properties>Metadata Style pane in the Card tab, as shown below, or in the new Content & Layouts>Layout Templates section when designing cards and layouts.
Check out Adobe’s Using Custom Fonts in Cards and Using Layout Templates to Create Cards and Layouts pages for more information.
For weekly tips and updates on DPS, DPS 2015, and InDesign, check out our blog and sign up for our newsletters. Want to learn even more and become an InDesign or a DPS expert? Check out all our best-selling handbooks and apps.
Note: Information contained in this post is current at the time of posting. Visit the Technology for Publishing News & Events blog for the latest info on Adobe software releases and functionality.
Posted by: Monica Murphy


