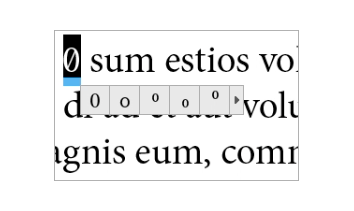
Not only does InDesign highlight characters that have available alternate glyph characters, but it also allows a user to simply select an alternate from a contextual menu and replace the original.
When a word is selected, a blue underline will appear under any character with an alternate glyph. A contextual menu will appear when hovering the mouse over the underline. With the original character selected in the document, click the glyph in the contextual menu to replace it.
A maximum of five alternate glyphs are displayed for a selected character at a time. If there are additional alternate glyphs, a forward arrow will appear. Clicking the arrow will reveal the other characters. Clicking the arrow when all of the characters are displayed or highlighting the arrow and pressing Return will open the glyphs panel.
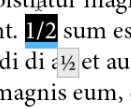
And it gets better! Creating fractions from selected text works the same way.
Note: If you want to keep your hands on the keyboard, with the character selected, hit the down arrow to reveal the contextual menu. Using the right/left arrows, navigate to a glyph, then press Return.
For more information about using alternate glyphs, see Adobe’s Work With Glyphs More Easily tutorial.
For weekly tips and updates on Digital Publishing Suite, Digital Publishing Solution, and InDesign, check out our blog and sign up for our newsletters. Want to learn even more and become an InDesign or DPS expert? Check out all our best-selling handbooks and apps.
Note: Information contained in this post is current at the time of posting. Visit the Technology for Publishing News & Events blog for the latest info on Adobe software releases and functionality.
Posted by: Monica Murphy


